OpenID Connect
Postal supports OpenID Connect (OIDC) allowing you to delegate authentication to an external service. When enabled, there are various changes:
- You are not required to enter a password when you add new users.
- When a user first logs in with OIDC, they will be matched to a local user based on their e-mail address.
- On subsequent logins, the user will be matched based on their unique identifier provided by the OIDC issuer.
- Users without local passwords cannot reset their password through Postal.
- Users cannot change their local password when associated with an OIDC identity.
- Existing users that currently have a password will continue to be able to use that password until it is linked with an OIDC identity.
Configuration
To get started, you'll need to find an OpenID Connect enabled provider. You should create your application within the provider in order to obtain a identifier (client ID) and a secret (client secret).
You may be prompted to provide a "redirect URI" during this process. You should enter https://postal.yourdomain.com/auth/oidc/callback.
Finally, you'll need to place your configuration in the Postal config file as normal.
oidc:
  # Start by enabling OIDC for your installation.
  enabled: true

  # The name of the OIDC provider as shown in the UI. For example:
  # "Login with My Proivder".
  name: My Provider

  # The OIDC issuer URL provided to you by your Identity provider.
  # The provider must support OIDC Discovery by hosting their configuration
  # at https://identity.example.com/.well-known/openid-configuration.
  issuer: https://identity.example.com

  # The client ID for OIDC
  identifier: abc1234567890

  # The client secret for OIDC
  secret: zyx0987654321

  # Scopes to request from the OIDC server. You'll need to find these from your
  # provider. You should ensure you request enough scopes to ensure the user's
  # email address is returned from the provider.
  scopes:
    - openid
    - email
If your Identity Provider does not support OpenID Connect discovery (which is enabled by default, you can manually configure it.) For full details of the options available see the example config file.
By default, Postal will look for an email address in the email field and a name in the name field. These can be overriden using configuration if these values can be found elsewhere.
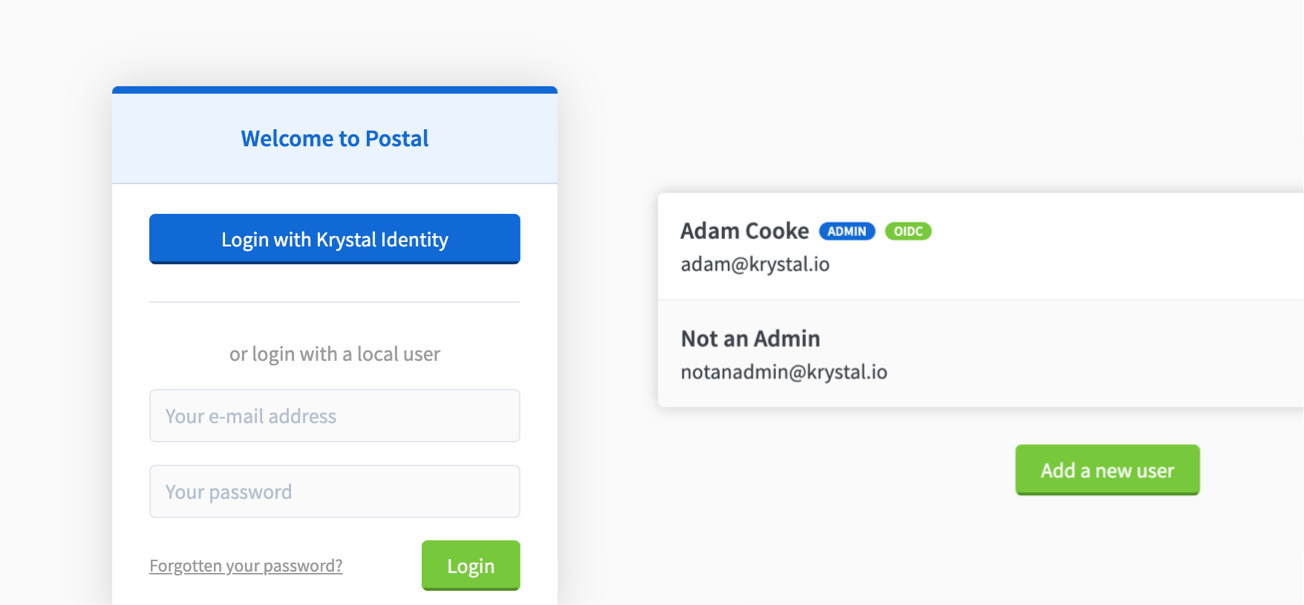
Logging in
Once enabled, you can log in by pressing the Login with xxx button on the login page. This will direct you to your chosen identity provider. Once authorised, you will be directed back to the application. If a user exists matching the e-mail address returned by the OpenID provider, it will be linked and you will be logged in. If not, an error will be displayed.
Debugging
Details about the user matching process will be displayed in the web server logs when the callback from the Identity provider happens.
Disabling local authentication
Once you have established your OpenID Connect set up, you can fully disable local authentication. This will change the login page as well as user management options.
oidc:
  # ...
  local_authentication_enabled: false
Using Google as an identity provider
Setting up Postal to authenticate with Google is fairly straight forward. You'll need to use the Google Cloud console to generate a client ID and secret (see docs). When prompted for a redirect URI, you should be https://postal.yourdomain.com/auth/oidc/callback. The following configuration can be used to enable this:
oidc:
  enabled: true
  name: Google
  issuer: https://accounts.google.com
  identifier: # your client ID from Google
  secret: # your client secret from Google
  scopes: [openid, email]